Travel
Annapurna Circuit Trek: Cost, Permits and Best Season—A Transparent Planning Guide
EverestBlog AI · Nov 1, 2026 · 21 min read
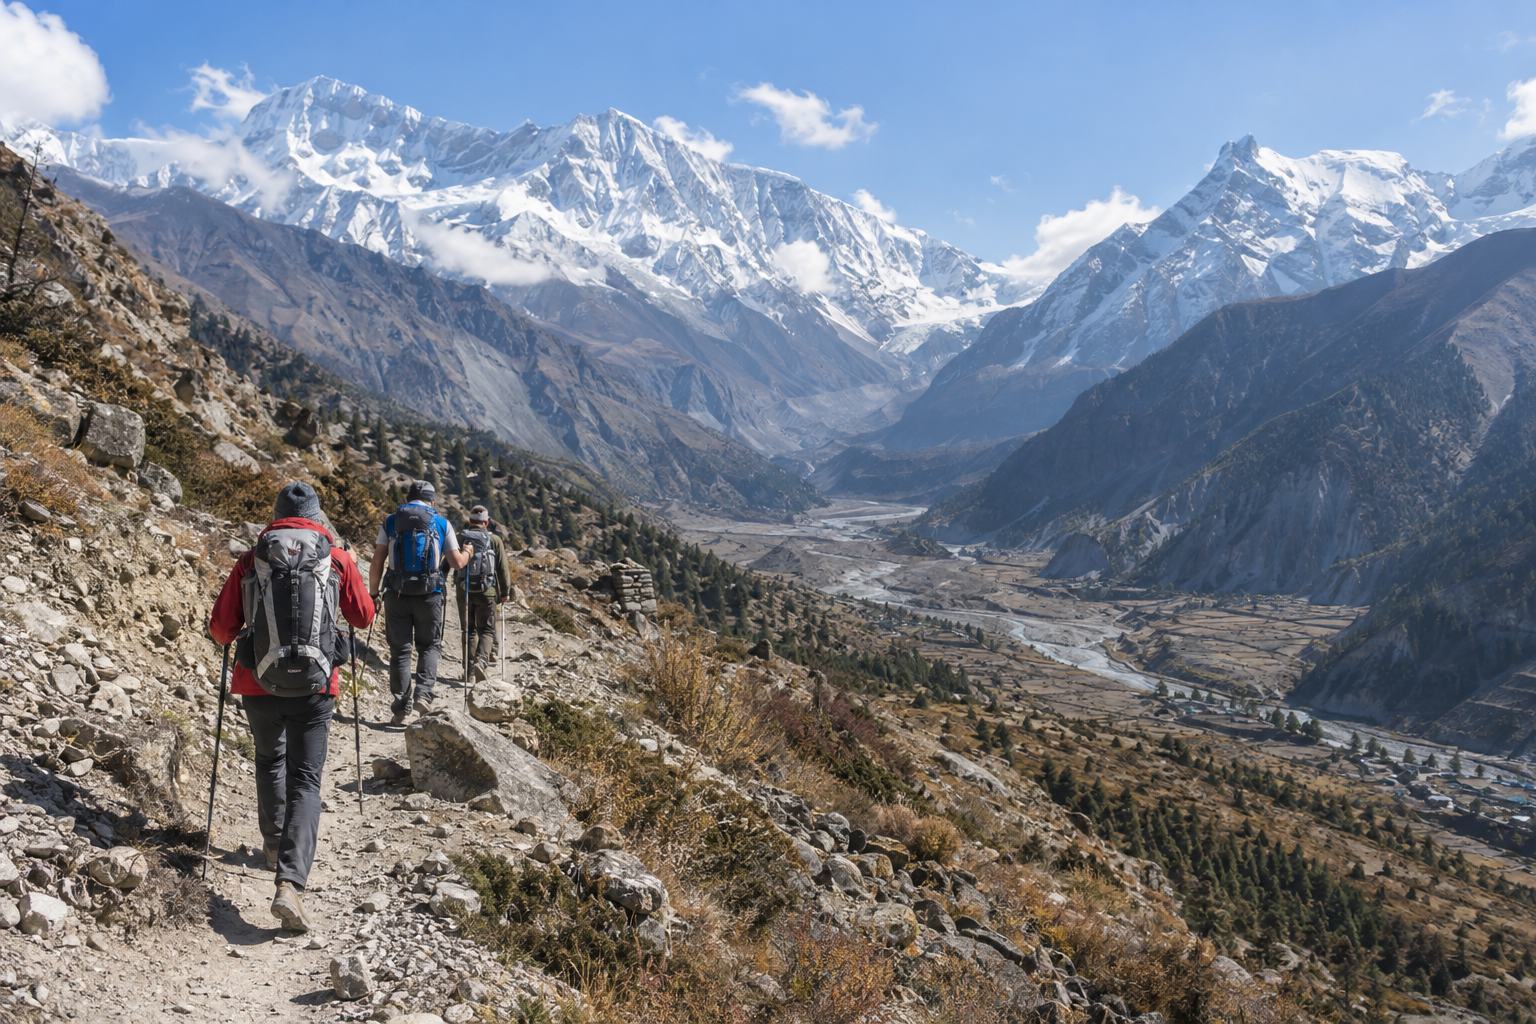
Above Manang, the Annapurna Circuit enters high mountain terrain where acclimatisation and weather shape the journey. · AI-generated illustration
The Annapurna Circuit trek is a journey through changing Himalayan landscapes and the communities that live within them. Forested valleys give way to drier, higher country, while village paths connect places shaped by farming, trade, tourism and religious traditions. For many walkers, its appeal lies in that gradual change: the mountains are spectacular, but the experience also comes from travelling between settlements, sharing lodge meals and adjusting to life on foot.
If you are planning your first circuit, however, the practical questions can quickly overshadow the excitement. How much money should you set aside? Which permits apply to your trip? When should you go? Online answers often look reassuringly simple until you compare them. One person’s total may cover an organised holiday, while another’s describes only spending along the trail. Both figures might reflect genuine experiences, yet neither is useful without knowing what sits behind it.
This guide offers a transparent planning framework, not one unexplained total. The aim is to help you understand what your own trip needs, identify what a quoted price includes and recognise the decisions that could change your budget. Rather than treating someone else’s spending as a promise, you will learn to build a working plan whose assumptions are visible. That makes it easier to compare options fairly and revise your expectations when arrangements change.
A useful starting point is to separate three kinds of information: what you have decided, what you have been quoted and what still needs checking. Your preferred travel style belongs in the first group. A written offer from a trekking company belongs in the second. A rule or service detail that may have changed belongs in the third. Keeping these categories distinct prevents an early estimate from quietly turning into something you mistake for a confirmed booking.
It also helps to define what you mean by “the cost of the trek.” Are you asking about the walking portion alone, or the wider trip that makes it possible? There is no single correct boundary, but you need a consistent one. Otherwise, a seemingly affordable option can become difficult to compare with a more complete package. Later sections will help you establish that boundary and organise expenses without hiding important exclusions inside a headline figure.
Money is only one part of a workable plan. The circuit involves high-altitude trekking, and a sensible itinerary must leave room for acclimatisation, personal wellbeing and changing conditions. A budget should support that flexibility rather than pressure you to keep moving because every night has been tightly allocated. No planning guide can guarantee that your body, the weather or local transport will follow your preferred schedule.
The same care applies to information about access and administration. Requirements can depend on current rules and how your trip is arranged. Whenever a detail needs fresh confirmation, this guide will make that clear: check locally. Treat that instruction as a practical planning task, not a minor footnote. Record when you checked an important requirement and who confirmed it, so you know which parts of your plan may need another look before departure.
The sections ahead move from defining your trip to building an itemised budget, allowing for optional purchases and a separate contingency reserve, checking permits and assessing seasonal trade-offs. You do not need to settle everything at once. By the end, the goal is a plan you can explain in plain language: what it covers, what remains uncertain and where you have allowed flexibility. For a first-time circuit planner, that clarity is more valuable than a confident-looking total with no explanation.
Set the Budget Baseline: Route, Duration and Inclusions
Before comparing quotes for the annapurna circuit trek, give every estimate the same starting point. A shorter walking route, fewer overnight stops or a package that excludes meals can look cheaper without offering the same trip. Use the model below to establish a shared baseline, then adjust it to your actual transport connections, walking pace and support needs.
Start with an 18-day planning window
Our working example runs from Kathmandu back to Kathmandu in 18 days, with walking from Dharapani to Jomsom via Thorong La. Access roads, trail diversions and onward connections can change, so check locally before fixing either endpoint. A place name on a transport listing does not guarantee a reliable connection on your chosen day.
- Two approach days: Travel from Kathmandu towards the trail, allowing an intermediate overnight stop and a second night at Dharapani.
- Thirteen on-route days: Budget for the journey from Dharapani to Jomsom, including two acclimatisation days rather than thirteen days of continuous forward movement.
- Two return days: Allow for travel from Jomsom back to Kathmandu, with an intermediate overnight stop.
- One uncommitted buffer day: Keep this available for a transport delay, weather interruption or a change in walking progress.
This is a budgeting model, not a guaranteed safe itinerary. It does not prescribe overnight elevations or establish that two acclimatisation days will be sufficient for everyone. The actual schedule must respond to altitude, symptoms, weather and local advice. A spare day is not permission to continue ascending when unwell, and turning back may still be necessary.
Fix the party size and sharing rules
Assume two adults travelling together, sharing one basic twin room where available. Calculate accommodation per room, then divide shared costs between two people. Calculate food, permits and personal purchases separately for each traveller. Do not assume a quoted room price includes meals, an attached bathroom or hot water.
For a consistent supported-trip comparison, assume the pair shares one guide and no porter in the baseline. Ask whether the guide’s accommodation, meals, transport, insurance and other employment-related costs are included in the quoted service price. If you add a porter or change the group size, rebuild those lines rather than simply dividing the original total differently. Verify current staffing requirements before booking.
Count nights and meals explicitly
Eighteen calendar days contain 17 overnight slots before the final day ends. In this example, allocate two nights to the approach, thirteen to the on-route block—including the arrival night in Jomsom—and one to the return journey. That gives 16 chargeable trek-and-transit nights, or 16 shared room-nights for the pair. The remaining night is in Kathmandu after returning and sits outside this trek budget.
If the buffer is used before reaching Kathmandu, an additional trek or transit night may replace that excluded city night. Treat its accommodation and meals as a contingency draw, not as a free extension.
For food, start with three meals daily: 54 meal slots per person across the full window. For this baseline, count 48 meals across the first sixteen days, plus breakfast and lunch on the return-to-Kathmandu day: 50 budgeted meals per person, or 100 for the pair. Leave that evening’s dinner and the final day’s three city meals outside the trek subtotal. Adjust these counts if transport timing changes; drinks and snacks remain separate.
Make the exclusions visible
Explicitly exclude international flights, Nepal visa costs and pre-/post-trek city stays. Keep them in a separate whole-holiday budget. Request quotes against the same route, party size, nights, meals and support assumptions, with every inclusion written down. That makes a package price meaningfully comparable with an independently assembled estimate.
Essential Expenses: Build an Itemised Working Budget
Build your annapurna circuit trek budget from the route, duration and inclusions you have already chosen. Use Nepalese rupees (NPR) as the working currency. No live prices or exchange rate are verified here, so rates remain check locally. If you convert the total, record the exchange-rate source and date, and allow separately for bank, card or cash-withdrawal fees.
Carry your baseline quantities into the worksheet: T = trekking days, N = paid accommodation nights, and P = people sharing costs. Count travel-day meals, overnight stops and transport legs separately where they fall outside T or N. Do not automatically assume that nights equal trekking days minus one: your arrival, exit and road connections determine the actual count.
Itemised cost worksheet
Each entry below follows the same columns: expense; unit; quantity; rate source/date; subtotal. Replace every blank rate with a verified quote and its date before treating the total as usable.
- Required transport: Unit: ticket per person, or vehicle per group. Quantity: every baseline approach, connecting and return leg. Rate source/date: operator or booking quote, check locally; record date. Per-person subtotal = sum of individual tickets + sum of shared vehicle charges ÷ P. Confirm baggage charges and whether quoted transfers reach your actual trailhead.
- Accommodation: Unit: room per night, or bed per person per night. Quantity: N, split by overnight stop and occupancy. Rate source/date: lodge or operator confirmation, check locally; record date. Per-person subtotal = sum of bed charges + sum of shared room charges ÷ actual occupants. Check whether the room price depends on buying meals there.
- Meals: Unit: meal per person. Quantity: count breakfasts, lunches and dinners from the baseline, including necessary travel-day meals. Rate source/date: lodge menus or itemised operator quote, check locally; record date. Per-person subtotal = sum of meal quantities × their respective rates. Use stop-specific estimates where available rather than assuming one valley-wide price.
- Safe drinking water: Unit: refill, treated litre or treatment dose. Quantity: daily planned water volume × T, plus travel-day needs. Rate source/date: refill provider or treatment supplier, check locally; record date. Per-person subtotal = purchased safe-water quantities × rates + treatment supplies. Avoid counting the same water twice; follow treatment instructions, including cold-water contact times.
- Verified permits: Unit: permit per eligible traveller. Quantity: each permit confirmed as applicable to your route and nationality. Rate source/date: relevant issuing authority, check locally; record verification date. Per-person subtotal = sum of verified permit fees. Keep any agent processing charge separate and identify permits already included in a package.
- High-altitude trekking insurance: Unit: policy per person. Quantity: one policy covering the full trip period. Rate source/date: insurer’s written quotation and policy wording, check locally; record date. Per-person subtotal = premium + necessary extensions. Confirm trekking cover reaches your highest planned elevation, including Thorong La if crossing it, and check rescue, evacuation, medical treatment, excess and exclusions.
- Necessary gear gaps: Unit: purchased item or rental day. Quantity: only missing essential equipment; use the full collection-to-return period for rentals. Rate source/date: retailer or rental shop, check locally; record date. Per-person subtotal = purchases + rental days × daily rates. Divide genuinely shared equipment by its users; track refundable deposits separately.
- Required guide service: Unit: guide day or quoted service package. Quantity: covered service days if required under verified current rules. Rate source/date: registered agency’s written quote, check locally; record date. Per-person subtotal = total guide charge ÷ P, plus any explicitly excluded guide expenses. Confirm transport, food, lodging and insurance arrangements.
Before adding the rows: mark each item “included,” “pay separately” or “not applicable.” Add a package price only once. For insurance, verify evacuation authorisation procedures, payment arrangements and whether rescue and medical limits differ; helicopter evacuation is not an automatic entitlement.
Optional Purchases and a Separate Contingency Reserve
A useful budget for the annapurna circuit trek separates things you might choose to buy from money you may need when plans change. Keep these as two distinct blocks: optional spending and contingency reserve. A hot shower should not quietly use up the cash set aside for an unplanned overnight stop.
Budget block one: optional spending
Give discretionary purchases their own allowance, based on your habits rather than somebody else’s total trek cost. Availability and charges vary between villages and lodges, and services may be unavailable even when advertised. Check locally before ordering or using anything you expect to cost extra.
- Snacks and extra drinks: Budget separately for chocolate, biscuits, soft drinks and tea beyond your meal allowance. Small purchases can accumulate over a long walking itinerary.
- Alcohol: Treat it as discretionary, not part of your hydration budget. Avoid it while acclimatising or if you feel unwell at altitude.
- Wi-Fi and charging: Ask whether access is included, charged separately or limited. Electricity and connectivity can be unreliable; paying does not guarantee a strong connection or uninterrupted power.
- Hot showers: Confirm the charge and whether hot water is actually available. Do not assume a private bathroom includes a hot shower.
- Room upgrades: An attached bathroom or different room category may cost more where available. Keep expectations flexible, especially when lodges are busy.
- An optional porter: If your baseline assumes you carry your own pack, price porter support as a separate choice. Confirm the agreed load, working days, insurance arrangements and responsibility for food, accommodation and return transport. Once booked, move it into committed costs.
- Tips: Allow for any gratuities you intend to give guides, porters or other staff. Ask about current expectations, but do not mistake an informal suggestion for a fixed official charge.
A guide belongs in this block only if hiring one is optional under the verified rules for your route and circumstances. Do not rely on old blogs or another trekker’s experience. Check current requirements with the relevant tourism authorities and a licensed trekking agency before departure. If a guide is required, that expense belongs in your essential budget.
For everyday extras, multiply your chosen daily allowance by your planned trekking days. Add separately quoted services and intended tips. This makes it easier to cut luxuries without cutting your safety margin.
Budget block two: a protected contingency reserve
Build your reserve from realistic disruption scenarios, not a universal percentage. Ask what an additional night would actually cost: a room, meals, necessary communications and any extra guide or porter day charges. Then consider how many additional days your itinerary and onward connections could reasonably require.
Working calculation: reserve = plausible extra days × realistic extra-day cost, plus a separate transport-disruption allowance and applicable insurance excesses. Use current quotes where possible; check locally for changing charges. Avoid counting the same expense twice.
Weather delays, an extra acclimatisation stop, road disruption or a missed connection can each extend the trip. Check whether changing transport or accommodation bookings creates additional costs. Read your insurance terms for excesses, exclusions and emergency-payment procedures: an excess allowance alone may not cover money you must initially pay yourself.
Do not assume you can withdraw cash whenever this reserve is needed. ATMs are not available in every settlement, and machines can be offline, empty or incompatible with your card. Card payments are not dependable throughout the route. Arrange sufficient rupees before remote stretches, carry useful smaller denominations and divide cash securely between separate places.
A reserve is not a substitute for insurance. Obtain cover appropriate to your planned activities and maximum altitude, and verify evacuation, treatment and disruption terms. Keep your insurer’s emergency contact details accessible offline.
Dated Permit Checklist: What to Verify Before Departure
Before starting the annapurna circuit trek, confirm the permissions that apply to your exact itinerary and traveller category. Requirements can depend on nationality, the places visited and current trekking regulations. The checklist below is a verification framework, not confirmation of today’s rules. Current fees and requirements: check locally. No “Last verified” date is included because current authoritative information has not been checked for this section.
Start with Your Route and Traveller Details
Send the same itinerary to the National Trust for Nature Conservation (NTNC)/Annapurna Conservation Area Project (ACAP) and the Nepal Tourism Board (NTB). Include your nationality, any relevant residency status, travel dates, starting and finishing points, overnight stops and side trips. State whether you intend to walk independently, hire a guide directly or book through an agency. Ask which traveller category applies to you and request written clarification where official information is unclear.
Annapurna Conservation Area Permit
Confirm with NTNC/ACAP whether your complete route requires an Annapurna Conservation Area Permit (ACAP), including any approach or exit sections travelled by vehicle. Do not assume that a short visit, an alternative trail or an agency booking removes your permit obligations.
- Issuing body: Confirm the responsible NTNC/ACAP office and any authorised issuing outlet.
- Verified fee: Check locally for your traveller category, including any applicable concessions or additional charges. Separate the official fee from agency processing costs.
- Documents: Check locally for passport or identity-document requirements, photographs, application details and any supporting evidence for concessions.
- Application channel: Confirm current official online or in-person options, processing time, office hours and payment methods.
- Checkpoint use: Ask where the permit must be shown, whether a printed original is necessary, and what validity, exit or re-entry conditions apply.
- Source link: Start at the official NTNC website, https://ntnc.org.np/, then record the specific permit page or written office response supporting your answers.
TIMS, Guides and Agency Requirements
Confirm TIMS applicability with NTB for the Annapurna Circuit and your traveller category. Ask separately whether a Trekkers’ Information Management System (TIMS) registration or card is required, whether a licensed guide is mandatory, and whether arrangements must pass through a registered trekking agency. These are distinct questions; an answer about one does not settle the others.
- Issuing body: Ask NTB which organisation currently issues or processes the relevant TIMS documentation.
- Verified fee: Check locally for the official charge and any category-based differences; request a separate agency-service breakdown.
- Documents: Confirm required identification, itinerary, insurance information, photographs and guide or agency details, where applicable.
- Application channel: Check locally whether you can apply directly or must use an authorised agency, and how to confirm that agency’s registration.
- Checkpoint use: Ask what evidence you must carry and where registration or inspection is required.
- Source link: Start at the official NTB website, https://ntb.gov.np/, and save the exact current guidance or written response.
For any guide or agency obligation, record the authority responsible, the rule’s scope, applicable exemptions and the evidence needed to demonstrate compliance. A trekker’s report of passing checkpoints without documents is not legal guidance. If official answers conflict, check locally with NTB and NTNC/ACAP before committing to independent arrangements.
Check Extensions and Save Your Verification Record
Flag extensions such as Nar–Phu or Upper Mustang for separate restricted-area permission checks. Confirm their boundaries and requirements with Nepal’s Department of Immigration at https://www.immigration.gov.np/, alongside NTB and ACAP. Do not assume your main-route paperwork covers a side trip.
Keep one record per requirement: issuing body, verified fee, documents, application channel, checkpoint use, source link and confirmation date. Add “Last verified” only after checking current authoritative sources. Leave unresolved fields marked “check locally”, and reconfirm them before departure.
Best Season: Compare Weather, Visibility and Trail Conditions
The best season for the annapurna circuit trek depends on your tolerance for cold, rain, busy lodges and possible delays. Spring and autumn usually offer the most workable balance, but neither guarantees clear views or a safe crossing of Thorong La. Plan around current conditions, not just the month printed on your itinerary.
A Compact Seasonal Comparison
- Spring: March–May. Weather: Lower valleys become warmer, while high elevations remain cold; snow can linger into spring, and afternoon showers become more likely towards May. Views: Often clearer early in the day, with haze or cloud later. Crowds: A popular trekking period. Lodges: Generally operating along the established route; check locally for individual stops. Access: Often workable, but lingering snow or fresh storms can disrupt the pass approach.
- Monsoon/summer: June–August. Weather: Frequent rain on wetter southern slopes; comparatively drier conditions in rain-shadow areas. Views: Often obscured, with occasional clear breaks. Crowds: Usually lighter. Lodges: Some operate, while others reduce service or close; check locally. Access: Landslides, damaged roads, swollen streams and slippery trails can interrupt both trekking and vehicle connections.
- Autumn: September–November. Weather: Conditions generally become drier after the monsoon withdraws, with colder nights as November approaches. Views: Often clear after the rains, though early September may remain cloudy and wet. Crowds: Frequently busy. Lodges: Usually widely available, but preferred stops can fill. Access: Commonly favourable once rain damage is repaired; storms and snowfall can still disrupt higher sections.
- Winter: December–February. Weather: Very cold at altitude, with short days and possible heavy snowfall. Views: Can be exceptionally clear between storms. Crowds: Generally low. Lodges: High-altitude choices may be limited or closed; confirm ahead. Access: Snow, ice and severe weather can make Thorong La impassable or lead to closure; transport and lower trails may also be disrupted.
One Circuit, Different Weather Patterns
The lower southern sections receive much more monsoon rain than the comparatively dry country beyond the main Himalayan range. Parts of the Manang and Mustang sides lie in a rain shadow, but drier does not mean rain-free or reliably accessible. Your journey may still depend on wet approach roads and vulnerable valley trails.
During the monsoon, landslides and rockfall can block roads or paths, while streams may become dangerous to cross. A dry destination does not make the journey there safe. After heavy rain, seek fresh local reports rather than assuming yesterday’s route remains usable.
Keep Thorong La Conditional
At Thorong La, snow, ice, strong wind and poor visibility can create serious problems in any season. Winter increases the likelihood of prolonged snow cover, limited services and an abandoned crossing. Ask lodge operators and experienced local guides about the route ahead, but do not treat another group’s successful crossing as proof that conditions remain safe.
Check current mountain forecasts, local trail reports and any official restrictions before committing to the high section. Leave time to wait or turn back. If conditions are deteriorating, do not press on simply to protect a booking or departure date.
Acclimatisation Matters More Than the Calendar
Ascend gradually, include acclimatisation days and avoid large increases in sleeping altitude. Good weather and fitness do not prevent altitude illness. A new headache with nausea, dizziness or unusual fatigue after ascending deserves attention: stop ascending and seek qualified medical advice.
If symptoms worsen or fail to improve with rest, descend. Confusion, difficulty walking straight or breathlessness at rest require urgent descent and emergency help; do not leave the affected person alone. Never cross the pass to “get over” symptoms. Discuss altitude risks and any medication with a qualified clinician before departure.
Conclusion
A well-planned annapurna circuit trek starts with decisions you can explain, not a total copied from someone else’s trip. Your route, available time, season and preferred level of support shape what you need to spend. The aim is not to predict every expense perfectly. It is to create a clear working budget, understand what could change and keep enough flexibility to respond without sacrificing safety or essentials.
Use the following sequence to turn your research into a plan you can book with confidence. Each step should settle a question before you move to the next.
- Choose a realistic route and season. Confirm that your intended itinerary fits your available days, physical preparation and comfort with the conditions discussed earlier. Make sure your budget covers the trip you actually intend to take, rather than a shorter or simpler version used to make the total look attractive. If your time or funds do not support that plan, revise the plan before committing money.
- Verify the requirements for your departure. Review the permit and documentation checklist, confirm what applies to your circumstances and record when you checked it. Keep a note of the source, too. If information conflicts or remains unclear, check locally before treating it as settled. A budget entry is not proof that the underlying requirement is current.
- Price the essential baseline. Bring together the necessary expenses already identified in your working budget. For every package or quote, distinguish what is included from what you must pay separately. Check that the number of days and the services covered match your itinerary. This is the amount against which you should assess affordability before adding purchases that are easier to postpone or decline.
- Add only the extras you value. Select optional spending deliberately rather than allowing every appealing possibility into the total. Give each selected extra a place in the budget, so it does not quietly draw money away from essential costs. If you need to reduce spending, this separate list makes the trade-offs visible without forcing you to rebuild the whole plan.
- Protect the contingency reserve. Keep it distinct from both your baseline and your optional spending. It is there for uncertainty, not to make an unaffordable itinerary appear affordable. Agree with your travel companions, if applicable, on what counts as a reason to use it. When a planned expense rises before departure, update the budget rather than automatically absorbing the difference into the reserve.
Once these decisions are made, write a short set of assumptions beside your total. State the itinerary and duration being priced, the intended season, the number of people sharing costs and the support arrangements you have chosen. Note which figures come from confirmed quotes and which remain estimates. These details make your budget useful: they explain what the total represents and reveal when a change requires a fresh calculation.
Verification dates matter as much as tidy arithmetic. Record when important requirements, transport arrangements and supplier quotes were checked. Where details change often, mark the item “check locally” and leave it visibly unresolved until confirmed. Before paying, revisit any assumption that no longer matches your departure plans.
There is no fixed universal cost that can honestly describe every Annapurna Circuit trek. A useful budget is transparent about its scope, its evidence and its remaining uncertainty. Choose a workable trip, verify the requirements, fund the essentials, select your extras and leave the reserve intact. That process gives you something more valuable than a reassuring headline figure: a plan you understand, can afford and can adjust when circumstances change.